Top Shields Introduction and Best PWE Shipping Practices

Itroduction

First off, what are and what’s the purpose of Top Shields?

Top shields are very similar to “classic” shields.  Same material/thickness as the blank/peel and seal.  The design is just like the classic shields, just bigger!

Classic shields are 3×4 inces (flap down) while the Top shields (flap down) are 3.69×4.69 inches.


Top shields have been the number 1 requested item and are meant to hold a top loaded card (or classic shield).  They also fit the smaller semi-rigids.  The larger semi-rigids (ones suggested for grading submissions) fit inside but the upper lip sticks out.  I plan on revising the design to better accomodiate the larger size semi-rigids in the future.


Envelope Recommendations

In order to minimize the chances of any Post Office (PO) issues, here’s some best practices you can follow to help yourself out when shipping with a plain white envelope (PWE).

First we’ll start with the envelope size!

I HIGHLY recommend to never use the 6 3/4 and #10.  When testing the #10 (single top shield with single standard size top loader inside), approximately 30% were hit with a non-machinable charge by the PO.  One even got hit with the parcel charge.  I believe the reason for this is that the 4.75” side had to lay horizontal in the envelope and that extra length vs the classic shields lenght (4”) was enough to cause the issue.

Recommended PWE size is the A9 (5 ¾ x 8 ¾ in) or the 6 x 9.

When testing in this size envelope (A9), so far none have been hit for non-machinable.


How to package

Vertically in the envelope!

Tape to a piece of paper (printer paper works just fine folded in half!). This prevents the shield from moving around in sorting and required by the PO

Can fit 2 top shields next to each other vertically in the envelope.


Number of Top Loaders per Shield

  • Only tested using standard size top loader
  • Can fit 3 top loaders but does not meet USPS max width requirement – too thick (1/4” max thickness requirement). Not recommended for PWE.
  • Tested with 2 standard size top loaders in 1 top shield.
  • No issues with using a non-machinable stamp with extra ounce stamp
  • Even 2 top shields with 2 standard size top loaders per shield had no issues when using a non-machinable stamp (with extra ounce)

Likely postage breakdown when using A9 or 6×9 envelope.  Remember to ALWAYS double check your weights for each envelope to make sure you have the appropriate amount of postage!  There are multiple variables that affect the total weight that so the likely postage might not work for each PWE of yours!

# of Shields # Top loaders/Shield Likely Postage Needed
1 1 Forever Stamp
2 1 Forever Stamp + Extra Ounce
1 2 Non-Machinable + Extra Ounce
2 2 Non-Machinable + 2X Extra Ounce


“Closing TAB”

The half circle tab that folds into the main body

This locking tab only works OK. It worked better on the prototypes.

Also, the oval piece of cardboard needs to get removed before you can use the closing tab. No machine can remove it so has to be done manually. This isn’t ideal but didn’t seem like a bad idea during prototyping.  I will be looking at replacement designs on the next order.

If you don’t want to use the “Closing tab” you can simply use tape or tuck the flap in. Tucking isn’t a problem like in the “classic” shield as the top loader prevents the flap from making direct contact with the cards inside.

TCGPlayer Upated policy to Seller Agreement – How this affects Custom Shields

On April 24th, 2024 TCG Player updated their seller agreement and one of the areas can possibly affect those that have custom printed shields.


https://help.tcgplayer.com/hc/en-us/articles/201307587-Marketplace-Seller-Agreement?utm_source=email-seller&utm_medium=email&utm_campaign=seller-newsletter-04252024-pre-professional-professional-enterprise&__s=9oregxtbwv6ogmiiuwtr&fbclid=IwZXh0bgNhZW0CMTAAAR2yQyK8v_KBIwAa80HLDVdxCu_7owV6Dsd9GJr25xXk9OGOPL1gXtS9_14_aem_ZmFrZWR1bW15MTZieXRlcw


The highlighed area is the update that affects custom printed shipping shields.  I’m assuming they consider custom prints on the sheilds possible “marketing” materials.


So what’s the mean to you!?  I’ll detail how that affects your custom printed shields, to the best of my ability.  Also, I reached out to TCGPlayer and talked with one of their representatives to ensure I fully understood how this affects you.


First, logos and store names are just fine!!!


Second, the only links allowed on the shields are to go to TCGPlayer directly (your TCGPlayer store on the website is obviously OK) with the exception being your direct TCGPlayer Pro Website.  Your TCGPlayer Pro store website is OK!  I also did clarify that the Shipping Shield website link is also OK (I’m assuiming because it doesn’t compete with TCG).  Also, despite being owned by Ebay, links to Ebay accounts are no longer allowed.


This also means links to your YouTube, Discord, Etsy and the previously mentioned Ebay are not allowed.


“Coupon codes or other promotional rebates outside of TCGplayer” would be against TCG’s updated terms.  I’ve received business cards in TCG orders that have a coupon code to purchase directly from the sellers website.  The same thing applies to any coupon code on a shield that only works on the store’s direct website (don’t do).


Another thing that is not allowed anymore would be a message that directs customers to reach out for order support though an email or phone number.  Basically, any customer support for an order through TCGPlayer must be done through TCG’s website and not through outside channels.


So, for those of you that have alreaedy purchased custom shields that are now against this policy???


The TCG rep. indacted that using up your existing inventory is fine.  They completely understand you’ve purchased these prior to the updated seller agreement and indicated they are (direct quote) “welcome to continue to use those for the time being. We do ask that after those shields are gone or we have reached a period of time where stricter enforcement is required, that they order new shields that follow the updated policy”.  This is great information to know and that they understand there are ramifications to how their change could cause a financial cost to you.


For those of you that sell on multiple platforms (through Crystal Commerce or BinderPOS), this change will and won’t affect you.  Any order that was received through TCGPlayer must follow these guidelines.  Any order outside of TCGPlayer obviously doesn’t matter to TCG.  This might mean you would want two different shield variants (easy to do!).  You’d have one that follows TCG guidelines and another (likely with more printed features on it) for all your non-TCG orders.


If you use your custom printed shields outside of TCG obviously none of this applys to you, though the selling platform you use might have their own guidelines.

If you have any questions, please let me know!  You can email me at inquiries@shippingshieldus.com or shippingshieldus@gmail.com


Best shipping practices for PWE

In order to minimize the chances of any Post Office (PO) issues, here’s some best practices you can follow to help yourself out when shipping with a plain white envelope (PWE).

First we’ll start with the envelope size!

I HIGHLY recommend to never use the 6 3/4 and use the #10, instead.
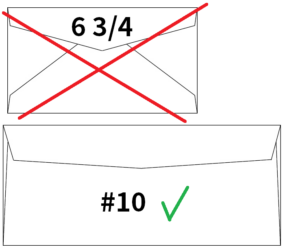
 

While there are other sizes, these are the two most common and readily available.  The 6 3/4 generally doesn’t have any issue, based on customer feedback and personal experience, but there’s an increased rate of PO issues with the smaller envelope.  The issue is typically an extra charge for the non-machinable rate.

Some sellers indicate that the reason for the increased issue with the 6 3/4 is due to the inability to “bend” the envelope in half, per USPS requirements.  While I can’t find that specific requirement for letters, it does exists for flats (large envelopes).

https://pe.usps.com/text/dmm300/101.htm#ep1002686

https://pe.usps.com/text/dmm300/201.htm#ep1079302 (exhibit 4.3b & 3.3c).

What I can inform you is that it doesn’t seem to matter whether the bend test for letters is or isn’t specified, from seller feedback (those that also use top loaders) post office employees seem to enforce this rule on letters which makes it an import thing to follow.


Now that we know to use #10s (the less common #9 should also be just fine), I’ll show you the best way to package your orders.


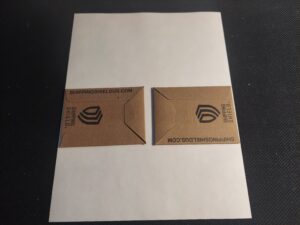
Step 1: Place shield on top of packing slip/piece of paper.  For this example I used an 8 1/2 x 11 sized paper.  I recommend to place the shield on the left side of the paper.  If you’re using two shields in the envelope, place them next to each other but DO NOT OVERLAP!  Also, a slight space is recommended.
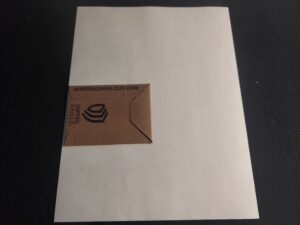
 

Step 2: Tape shield to paper.  I typically use scotch tape as that’s what I tape the folding flap on the shields with but it’s transparent and terrible for display purposes!  Masking/painters/washi tape are all great alternatives to scotch tape.  Taping the shield down is important for many reasons.  First is it prevents the shields from shifting in transit.  Not having things move around in letters is specified on USPS letter guidelines!  Second, if you place 2 shields in one envelope, you run the risk of them shifting and then overlapping each other.  Should this happen, no only do you increase your risk of the non-machinable surcharge, but an increased risk of a parcel surcharge!
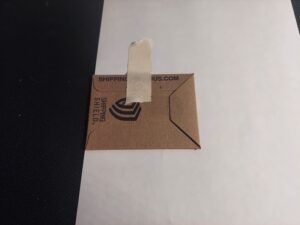
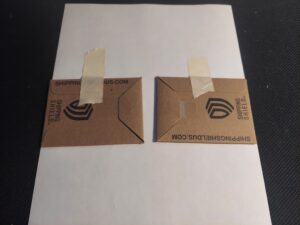
 

Step 3:  This one is easy, simply fold the paper over the shields so that it will fit inside the envelope.
 

Step 4:  Insert bundle inside #10 envelope.  When doing a single shield order, I recommend placing the bunde inside the envelope, so that the shield is on the same side of the return address.
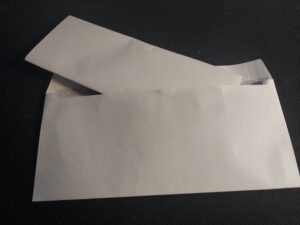
 

Step 5: Weigh, if needed, then add postage.  For most orders when you use one shield you won’t be over 1 oz.  It’s only when you start to fill up the shield where you’ll be over the weight limit.  Virtually all two shield orders will need the extra ounce stamp.

While the steps don’t mean you will never encounter a PO issue, as that’s impossible to guarantee, they are based on the feedback from thousands of customers and my own personal use.  Following them is what I recommend to minimize your chance of encounter any issue in the first place!


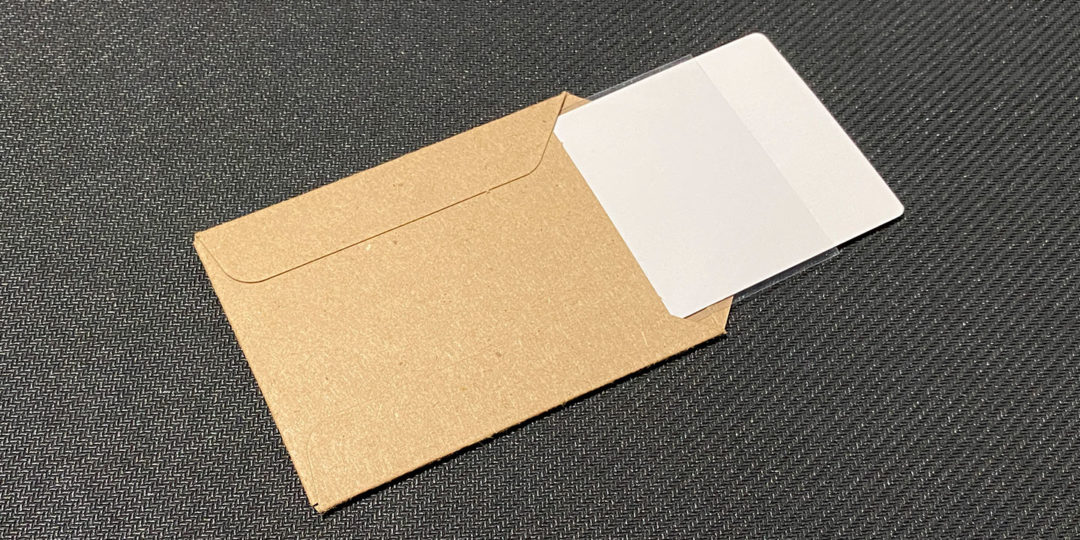
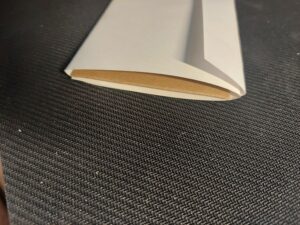
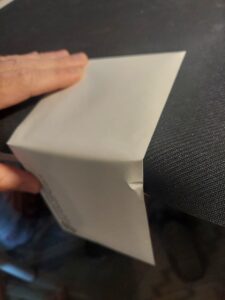
Extra info:  When you do one or two card orders, and by following the above steps, you should be able to bend your envelope to 90° like below.  This is done by placing the shields to one side of the paper/packing slip and taping them down.  The picture has 2 shields inside that envelope and packaged like explained above.


QR Codes

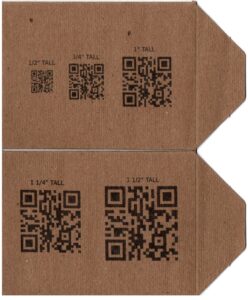
QR codes or 2D barcodes with URL links are absolutely possible on custom printed shields!

I printed 5 different sizes so you could a get an idea how much room they take up.

With regards to minimum size I was able to get the 1/2″ size to scan but it had to be inches away from my phone and the camera had trouble focusing. While every device is different I still wouldn’t recommend the 1/2″ size. The 3/4″ size seemed to have absolutely no problems scanning and that’s what I’d recommend.

If you’d like to get that actual image file that’s below, you can access it here.

https://drive.google.com/drive/folders/1MUQFxP6fsQM1L7VGuDGhedtXh4QMJms3?usp=share_link

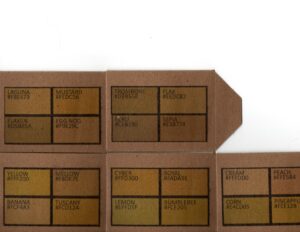
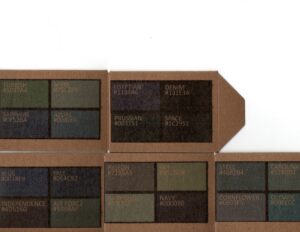
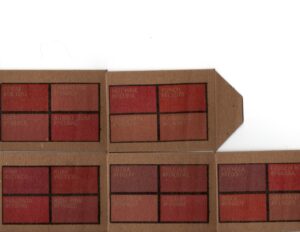
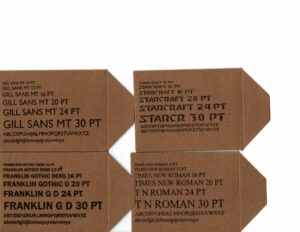
Color samples printed on Shields with Shield Printer

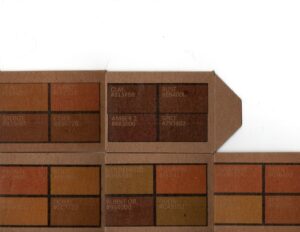
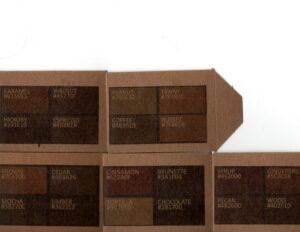
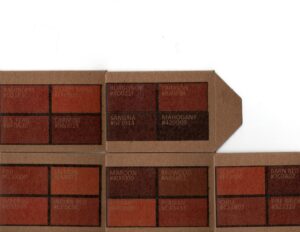
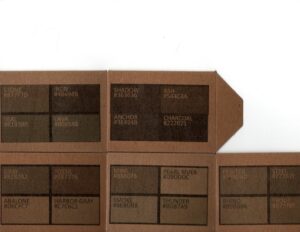
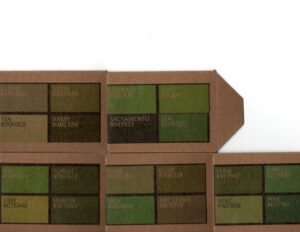
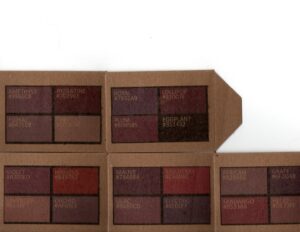
Here are various color groups printed on the shields to get a better representation how each color looks printed on the shields.

Since we’re printing on tan cardboard, instead of white paper, the colors on your screen won’t match what is actually printed.
This is to help you or your graphics artist with color selection.

This will be especially helpful when selecting yellows and oranges. Yellows come across the worst with oranges behind it. Once you start getting darker shades of any color, the colors become more difficult to identify.

If you’d like to get the files for the scans themselves, especially if you’d like to zoom in, they can be access here.
https://drive.google.com/drive/folders/1X1L1KBegAnxppjtElUw70JxasjOx6Bic?usp=share_link