In order to minimize the chances of any Post Office (PO) issues, here’s some best practices you can follow to help yourself out when shipping with a plain white envelope (PWE).
First we’ll start with the envelope size!
I HIGHLY recommend to never use the 6 3/4 and use the #10, instead.
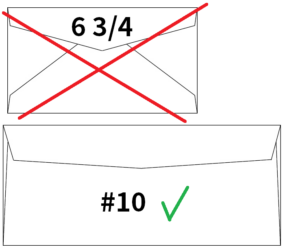
While there are other sizes, these are the two most common and readily available. The 6 3/4 generally doesn’t have any issue, based on customer feedback and personal experience, but there’s an increased rate of PO issues with the smaller envelope. The issue is typically an extra charge for the non-machinable rate.
Some sellers indicate that the reason for the increased issue with the 6 3/4 is due to the inability to “bend” the envelope in half, per USPS requirements. While I can’t find that specific requirement for letters, it does exists for flats (large envelopes).
https://pe.usps.com/text/dmm300/101.htm#ep1002686
https://pe.usps.com/text/dmm300/201.htm#ep1079302 (exhibit 4.3b & 3.3c).
What I can inform you is that it doesn’t seem to matter whether the bend test for letters is or isn’t specified, from seller feedback (those that also use top loaders) post office employees seem to enforce this rule on letters which makes it an import thing to follow.
Now that we know to use #10s (the less common #9 should also be just fine), I’ll show you the best way to package your orders.
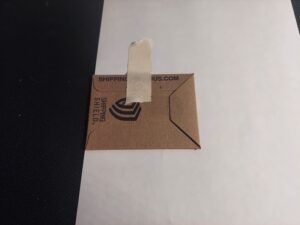
Step 1: Place shield on top of packing slip/piece of paper. For this example I used an 8 1/2 x 11 sized paper. I recommend to place the shield on the left side of the paper. If you’re using two shields in the envelope, place them next to each other but DO NOT OVERLAP! Also, a slight space is recommended.
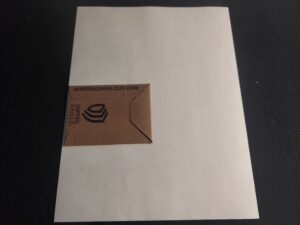
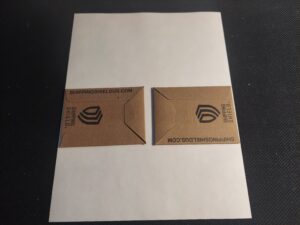
Step 2: Tape shield to paper. I typically use scotch tape as that’s what I tape the folding flap on the shields with but it’s transparent and terrible for display purposes! Masking/painters/washi tape are all great alternatives to scotch tape. Taping the shield down is important for many reasons. First is it prevents the shields from shifting in transit. Not having things move around in letters is specified on USPS letter guidelines! Second, if you place 2 shields in one envelope, you run the risk of them shifting and then overlapping each other. Should this happen, no only do you increase your risk of the non-machinable surcharge, but an increased risk of a parcel surcharge!
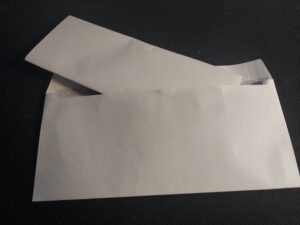
Step 3: This one is easy, simply fold the paper over the shields so that it will fit inside the envelope.
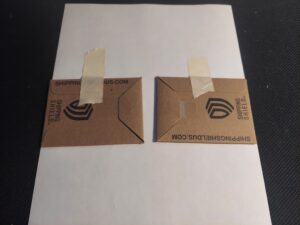
Step 4: Insert bundle inside #10 envelope. When doing a single shield order, I recommend placing the bunde inside the envelope, so that the shield is on the same side of the return address.
Step 5: Weigh, if needed, then add postage. For most orders when you use one shield you won’t be over 1 oz. It’s only when you start to fill up the shield where you’ll be over the weight limit. Virtually all two shield orders will need the extra ounce stamp.
While the steps don’t mean you will never encounter a PO issue, as that’s impossible to guarantee, they are based on the feedback from thousands of customers and my own personal use. Following them is what I recommend to minimize your chance of encounter any issue in the first place!
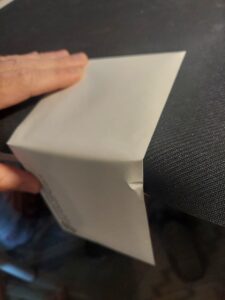
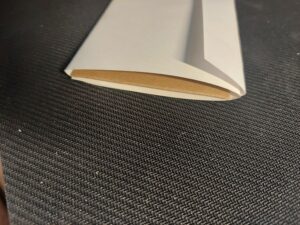
Extra info: When you do one or two card orders, and by following the above steps, you should be able to bend your envelope to 90° like below. This is done by placing the shields to one side of the paper/packing slip and taping them down. The picture has 2 shields inside that envelope and packaged like explained above.